Saturday, July 30, 2011

Threshing Techniques, Part 1 (Threshing Bag)

I've been meaning for some time to write a little article on our different techniques for threshing seeds (i.e. separating them from their various dry pods). We've just started harvesting and threshing certain brassica seeds here at the farm, so I thought I'd cover the ever so simple threshing bag method... my favourite technique for doing small podded seeds like kale and arugula. Coming soon will be an article on the threshing box... our main device for doing peas, beans and everything a bit bigger


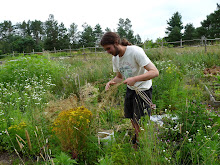
#1 - After harvesting the dry pods (Mizuna in this case) I'll let them dry further for another couple days in the greenhouse or in the barn. Once the pods are super-crispy and brown and
break apart with a slight touch you know they're ready to thresh!


#2 - My strategy for brassica seeds is to put the dry pods in a pillow case (which you should be sure doesn't have any holes!) and then to smash them any which way we can. You can hit it against a wall, stomp on it, knead it in your hands, flail it, run it over in the car... those little seeds are pretty indestructible. After a minute or two of work the pods are usually all broken open (it doesn't take much if they're dry enough) and have released they're seeds inside the bag. Now you just need to separate the seeds and the chaff...


#3 - I usually just grab the large top pieces of stem and shells and remove them by hand (that's what's in the wheelbarrow here) , the seeds are heavy and almost always settle in the bottom of the bag. To separate the seeds from the smaller chaff we use both screens and winnowing.


#4 - Screens sure are handy! The seeds drop right into the bucket and the pods stay on top. We were lucky to be gifted this awesome brassica seed screen, but any old homemade screen will do. It's handy having different sizes of mesh for different sized seeds.


#5 - The final step is winnowing. The screen gets most of the chaff out but if you want them really clean winnowing is often the way to go. It's just pouring the seeds back and forth between two containers in the wind, the heavy seeds fall and get caught while the lighter chaff gets blown away. A fan works wonders on those non-windy days.


#6 - Voila! The finished seeds! These two buckets are before and after winnowing, you can see how much cleaner they are afterwards.


Tuesday, July 12, 2011

3rd New Farmers Gathering, June 11-12

It's amazing how busy one can get on the farm in the summer time... it's taken me a month to find the time to post a report from what was an amazing event back in June: The 3rd New Farmers Gathering at The Lorax near Wolfville.

Nearly 100 farmers, aspiring farmers and folks who otherwise have a passion in working with the land turned out for the two days of workshops, bonfires and sharing experiences. I was lucky to catch a couple great workshops on seed growing (with Andrea Berry) and roundwood timber framing (with Mark Alvis) among lots of others.


- Farmers deep in discussion...


- Andrea Berry (right) of Hope Seeds put on a great seed saving workshop, here we are putting the theory into practice by planting a seed saving garden.


- Another of the highlights was planting a three sisters garden, with corn, beans and squash growing together. We were transplanting the corn seedlings into the hills so that they had a head start on the beans.


- I gave a scything workshop on Sunday afternoon, which proved to be quite a popular event. After some instructions and demonstrations probably 20 people got a chance to try their hand at mowing with a scythe. Here I am demonstrating honing with a whetstone.


- Some of the first swaths...


-After the students got into it we made short work of our hay meadow, we cleared probably a 1/4 acre in the course of the short workshop. Many hands (and scythes) make light work.